Making A Tor BridgeDB CLI interface with Rust
At ByIf you care about privacy and anonymity, or if you live in a country with very restricted internet access, you might have used Tor (The Onion Router) for anonymity or to bypass censorship.
In both cases, you might need to use Bridges to connect to the Tor network or to prevent your ISP from knowing that you’re using Tor.
What bridges do is obfuscate the traffic and act as alternative entry nodes, which take your data and deliver it to Tor’s entry node. You can either run your own bridge, which would require a VPS with free access to the internet and some technical expertise to set up and maintain, or you can use the tool provided by the Tor Project itself, called BridgeDB, to obtain public bridges.
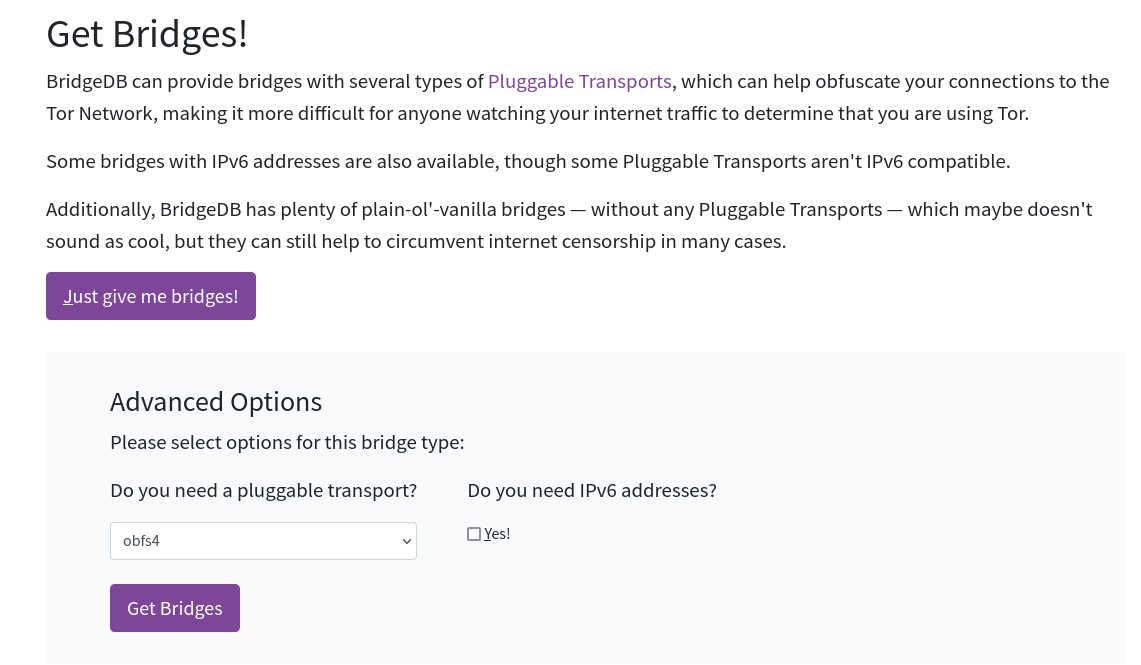
BridgeDB is accessible through its website at bridges.torproject.org, and it is the only interface it has. Therefore, I wanted to develop a CLI (command-line interface) application that retrieves bridges from the website in my terminal, eliminating the need to open a browser every time I need a new bridge.
For this project, I will be using the Rust programming language and the reqwest, scraper, and viuer crates. These crates will help me handle HTTP requests, perform web scraping, and display captchas in the terminal.
Setting Up the Binary Crate
First, we need to create a binary crate using cargo:
cargo new torbridge-cli --bin
This command will generate a Rust project named “torbridge-cli” with the necessary project structure and files for a binary crate.
For a cleaner structure, we will separate the project into two parts: the binary part and the library part. In the library part, we will handle all the scraping and communication with BridgeDB. In the binary part, we will parse the CLI arguments and handle user inputs.
To do so, we need to specify the library in our Cargo.toml file like this:
[lib]
name = "lib"
path = "src/lib.rs"
Then, we create a file named lib.rs in our src directory for the library, to write the library part there.
After specifying the library in our Cargo.toml, it’s time to add the dependency crates.
First, we add reqwest to our project:
cargo add reqwest --features=rustls,json
To have full async/await functionality, we need to add the tokio crate with rt-multi-thread and macros features enabled:
cargo add tokio --features=macros,rt-multi-thread
Then, we need to add the scraper crate, which is used for data scraping:
cargo add scraper
These crates are all we need for now to develop the library part of the project. For the binary part, we will need to add the viuer and base64 crates:
cargo add viuer
cargo add base64
The viuer is used to display images inside the terminal, which we will need to show the BridgeDB’s captcha.
Implementing the Library
Now that we have finished setting up the project and adding the required dependencies, we can move on to implementing the library and finally communicate with the BridgeDB website.
First of all, we are going to use the dependencies in our library, so we add this at the top of our src/lib.rs file:
use scraper::{Html, Selector};
use std:error:Error;
Then, we write a function to get the available transports from the BridgeDB for the user to choose from:
pub async fn get_transport_modes() -> Result<Vec<(String, String)>, Box<dyn Error>> {
    let options_page = reqwest::get("https://bridges.torproject.org/options/")
        .await?
        .text()
        .await?;

    let parsed_page = Html::parse_document(&options_page);
    let select_selector =
        Selector::parse(r#"select[id="bridgedb-advanced-options-transport"]"#).unwrap();

    let select_options = parsed_page.select(&select_selector).next().unwrap();

    let option_selector = Selector::parse("option").unwrap();

    let mut transports: Vec<(String, String)> = Vec::new();

    for option in select_options.select(&option_selector) {
        transports.push((
            option.value().attr("value").unwrap().to_string(),
            option.inner_html(),
        ));
    }

    Ok(transports)
}
What this function does is it performs a GET request to the https://bridges.torproject.org/options URL and searches for a <select> tag with the bridgedb-advanced-options-transport as its id attribute. It then retrieves the options’ values and inner HTML parts and adds them to a vector of tuples in the format: [("obfs4", "obfs4"), ("0", "None"), ("webtunnel", "webtunnel")].
After we got transport modes from BridgeDB, we can proceed to ask the BridgeDB to give us some bridges.
pub async fn request_transport(transport_type: &str) -> Result<(String, String), Box<dyn Error>> {
    let bridges_page = reqwest::get(&format!(
        "https://bridges.torproject.org/bridges?transport={transport_type}"
    ))
    .await?
    .text()
    .await?;

    let parsed_page = Html::parse_document(&bridges_page);

    let img_selector =
        Selector::parse(r#"img[alt="Your browser is not displaying images properly."]"#).unwrap();

    let image_base64 = parsed_page
        .select(&img_selector)
        .next()
        .unwrap()
        .value()
        .attr("src")
        .unwrap();

    let input_selector = Selector::parse(r#"input[name="captcha_challenge_field"]"#).unwrap();

    let challenge_field = parsed_page
        .select(&input_selector)
        .next()
        .unwrap()
        .value()
        .attr("value")
        .unwrap();

    Ok((image_base64.to_string(), challenge_field.to_string()))
}
In this function, we are requesting a bridge from BridgeDB based on the user-specified transport. We then search for the captcha image, which always has an alt attribute with the value of “Your browser is not displaying images properly.” Additionally, we look for an input field named captcha_challenge_field, which contains the challenge field corresponding to the captcha. We will need the challenge field when we send the captcha’s answer to BridgeDB later.
Also, it should be noted that the image is in base64 format, which we will later need to decode and write to a temporary file in order to display it using viuer. While there are better solutions available, such as using the image crate, I chose to keep it simple and avoid overcomplicating things.
After fetching the captcha, we can proceed to write the function that will send the user’s answer back to BridgeDB. If the captcha is correct, we will retrieve the bridges.
pub async fn submit_answer(
    transport_type: &str,
    challange_field: String,
    captcha_response: String,
) -> Result<String, Box<dyn Error>> {
    let mut challenge_data: HashMap<&str, String> = HashMap::new();

    challenge_data.insert("captcha_challenge_field", challange_field);
    challenge_data.insert("captcha_response_field", captcha_response);
    challenge_data.insert("submit", "submit".to_string());

    let client = reqwest::Client::new();
    let response_page = client
        .post(format!(
            "https://bridges.torproject.org/bridges?transport={transport_type}"
        ))
        .form(&challenge_data)
        .send()
        .await?
        .text()
        .await?;

    let parsed_page = Html::parse_document(&response_page);

    let bridgelines_selector = Selector::parse(r#"div[id="bridgelines"]"#).unwrap();

    let bridge_lines = parsed_page
        .select(&bridgelines_selector)
        .next()
        .unwrap()
        .inner_html();

    Ok(bridge_lines
        .lines()
        .map(|line| line.trim())
        .collect::<String>()
        .replace("<br>", "\n"))
}
Now that we have completed the library part, we can proceed to utilize what we have built in the binary crate and interact with the user through the CLI.
Interacting With The User
As mentioned earlier, the captcha will be in base64 format, and we will need to decode it and write it to a temporary file in order to view it using viuer within the terminal. Therefore, we will write a simple function in our binary part (located at src/main.rs) to handle this process.
To import the necessary dependencies and methods from the standard library into our binary part, we need to add the following import lines to the top of our binary file (src/main.rs):
use base64;
use std::error::Error;
use std::fs::File;
use std::io::{self, Write};

use viuer::{print_from_file, Config};
Next, we will write our function.
fn base64_to_image(base64_image: &str) -> Result<(), Box<dyn Error>> {
    let decoded_image = base64::decode(base64_image.replace("data:image/jpeg;base64,", ""))?;

    let mut file = File::create("/tmp/.bridgedb_captcha.jpeg")?;

    file.write_all(&decoded_image)?;

    Ok(())
}
Additionally, we will need another function that prompts the user to select the desired transport.
fn ask_transport_mode(transport_modes: &Vec<(String, String)>) -> String {
    for (index, &(ref _key, ref value)) in transport_modes.iter().enumerate() {
        println!("[{}] {}", index, value);
    }

    let mut user_input = String::new();
    print!("Chose your transport: ");
    io::stdout().flush().unwrap();
    io::stdin().read_line(&mut user_input).unwrap();

    match user_input.trim().parse::<usize>() {
        Ok(index) if index < transport_modes.len() => transport_modes[index].0.to_string(),
        _ => "obfs4".to_string(),
    }
}
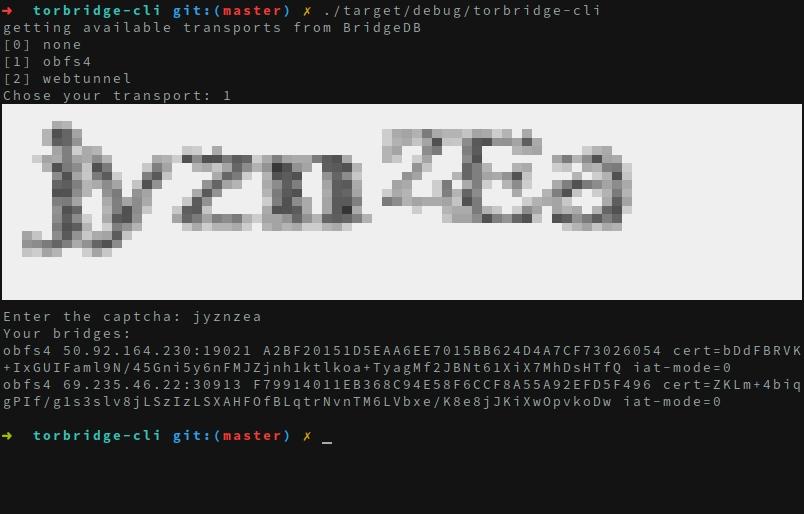
The purpose of this function is to display a prompt with a list of available transports. The prompt will look like this:
[0] none
[1] obfs4
[2] webtunnel
Choose your transport:
Now that we have written all the necessary functions, we can assemble them in the main function:
#[tokio::main]
async fn main() -> Result<(), Box<dyn Error>> {
    eprintln!("getting available transports from BridgeDB");

    let transport_modes = lib::get_transport_modes().await?;

    let transport = ask_transport_mode(&transport_modes);

    let captcha = lib::request_transport(&transport).await?;

    base64_to_image(&captcha.0)?;

    let viuer_config = Config {
        transparent: false,
        absolute_offset: false,
        x: 0,
        y: 0,
        restore_cursor: false,
        width: None,
        height: None,
        truecolor: true,
        use_kitty: true,
        use_iterm: true,
    };

    print_from_file("/tmp/.bridgedb_captcha.jpeg", &viuer_config)?;

    print!("Enter the captcha: ");
    io::stdout().flush().unwrap();

    let mut captcha_answer = String::new();
    io::stdin()
        .read_line(&mut captcha_answer)
        .expect("Failed to read line");

    let bridgedb_response =
        lib::submit_answer(&transport, captcha.1, captcha_answer.replace("\n", "")).await?;

    println!("Your bridges:\n{bridgedb_response}");
    Ok(())
}
Now, if we compile our program, we will have a CLI tool that retrieves bridges from BridgeDB directly within the terminal.
This crate was written hastily while I was working on this blog post, resulting in poor code quality and inadequate error handling. However, I plan to publish an improved version on my GitHub repository in the near future: https://github.com/zolagonano/torbridge-cli
Also, Here is a link to all the tools and crates I used in this project:
- BridgeDB: https://bridges.torproject.org
- Rust: https://rustlang.org
- reqwest: https://crates.io/crates/reqwest
- viuer: https://crates.io/crates/viuer
- tokio: https://crates.io/crates/tokio
- scraper: https://crates.io/crates/scraper
- base64: https://crates.io/crates/base64